Showing posts with label sew. Show all posts

Wednesday, January 19, 2011

Easy Baby Receiving Blankets


Yesterday my mom and I got together to sew up some receiving blankets.  We like to send them as part of relief packages to orphanages in other countries such as Haiti, to local shelters, and as part of hamper projects through different organizations.  They make an easy outreach project (and the sewing is minimal)!

How To:
  • We had the fabric cut in meter long pieces (receiving blankets have to be BIG in my humble opinion), then washed and dried it all to allow for shrinkage.  
  • Then we ironed the fabric while folding over the edges (twice) to form a nice crisp hem.  
  • After sewing the hems using a straight stitch, we folded the finished blankets then tied them individually with raffia and attached a little tag labeled with "Baby Receiving Blanket" - this just adds a nice personal touch.  


These blankets never take long and it is a great way for my mom and I to spend time together, not to mention that participating in giving itself is very rewarding and humbling.

- Kristin -

Friday, January 14, 2011

Drop Cloth Pillows / Table Runner and Doors


I was blessed with a couple of hours to myself yesterday; a rareity for sure!  I took that time to whip up a couple of pillows and a table runner that I have been meaning to do for some time.

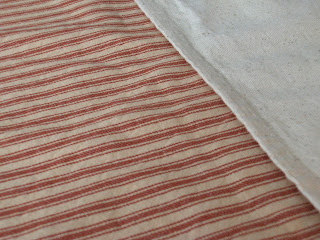
So this:


Became this:


I was excited to try sewing with drop cloths (the pseudo stand in for the antique grain sacks which cost an arm and a leg).  I paired it with some old country stripes for a really casual look.  Definitely a fan of the drop cloths as they they have a nice texture to them and were so easy to sew!  I made the table runner reversible 'cause I have a tendency to get board of things rather quickly when it comes to my everyday table setting :o)


Just so you know though, they will never be wrinkle free, but again that just gives character to the piece.  I think if I have time today, I will try acrylic paint on the drop cloths to imitate those old grain sacks like I have seen done here at Musings from a French Cottage.

I was also very excited to see these:


These are two of the five doors that are destined for the new playroom we are building in the basement (the reveal soon!).  I know they don't match what is upstairs already (as you can see from the closet doors in the picture), but I wanted something a little different and think they will work.  We have bought black knobs and hinges to give them a bit more of a rustic look.

Thursday, January 14, 2010

Handmade Fabric Bird


I have a deep affinity for birds and when I saw this, I was inspired to attempt a little bird myself . I think I like him so much I'm going to whip up a few more little birdie friends using more colourful fabric this time!

I love the idea that you can make this into a mobile for baby's nursery using twigs, fishing line and scraps of fabric; and wouldn't it be a really nice accent to a woodland-themed nursery?


If you want to make your own, check out Spool Sewing's free bird template for easy step-by-step instructions and download.

Wednesday, January 13, 2010

Easy Terry & Flannel Burp Cloth


I love making these burp cloths because they are so easy! I always enjoy the ragged edge ones, but these terry/flannel ones are much faster and they make great baby shower gifts that any mom-to-be would appreciate.

You will need:
a piece of flannel print cut to 17 x 8
a piece of terry cut to 17 x 8
a spool of nice, thick thread (best for sewing with terry)


Step One:
Cut your flannel to size, then use it as the pattern for cutting the terry. If you pin the flannel to the terry upside down you will be ready to sew the right sides together as soon as you are finished cutting.

Step Two:
With right sides of the fabric together and using a 1/4" seam, sew around the perimeter of your rectangle leaving a 3" hole for turning. It can be helpful to mark where your stitching will begin and end with double pins. I seem to have a bad habit of stitching up the whole thing and leaving myself no way of turning my work, so the pin thing really does help prevent that.


Step 3:
Trim your corners on an angle as close to the stitching as possible (without cutting your thread) then turn the rectangle right side out through your 3" hole.

Step 4:
Wiggle your corners to make them as right angled as you can, then press the fabric with an iron (don't forget to fold in the edges where your turning hole is and press well). Ironing is really important because it helps give a really crisp edge to your work and makes the next step (top stitching) easier.

Step 5:
Using a coordinating thread (I like to use cream most of the time, however), top stitch around the perimeter of your rectangle using a 1/4" seam. Trim any excess threads and voila!


Hopefully you enjoy making these as much as I do!

Wednesday, January 6, 2010

Quick Moses Basket Updating


I LOVE moses baskets! I think that they are the most practical thing and for the first two months or so when my two were babies, I carried my moses basket everywhere. It was so nice to have a comfy place to lay my children while they slept and we visited with friends and family.

Now that my sister is expecting, she has asked to borrow the moses basket. While I was totally going to lend it to her (she did buy it for me after all), I just happened to be visiting a friend who, after 5 kids, was finally saying goodbye to all her baby things. Among the vast array of things was this well-loved-but-still-in-great-condition moses basket which I snagged right away! All it needed was a little update and even I, as an inexperienced sewer, could do that ...

This was the pad that originally came with the basket:


A little dated (in terms of fabric) and lacking in the comfort factor (i.e. very thin). So, using the original pad as my pattern, I cut out two pieces of quilt batting and zigzag stitched both pieces to either side of the original pad. I trimmed the edges then used this "new" pad as my pattern for my polka dot fabric which I found at Joanne's - isn't it sweet?


Since my sister doesn't know if it is a girl or a boy, I decided to double side the pad so she could use the green if it is a boy, or pink if it is a girl. I stitched right sides together of the polka dot fabric leaving a opening for turning. I pressed the seams then turned the cover right side out and stuffed the "new" pad in. I finished off the opening by pining and top stitching it.


Not the greatest pictures, I admit ... these are just to give you an idea of the final product.


Now what I am wondering is if I have to worry about the inside sides of the basket? Mine was covered in fabric which is more cozy, so I suppose I should do something here too ... that, however is totally beyond my sewing skills and I will have to consult someone about it.

At any rate, I will be including several burp cloths and a couple of extra large receiving blankets (the bought ones are always too small in my opinion), which I think will make a lovely gift.

Thursday, December 17, 2009

Wheat Heating Bag


I have been a busy bee these last couple of days! I made up a few of these wheat heating bags for stocking stuffers. Well, actually they won't exactly fit IN the stockings, more liked wrapped gifts beside the stockings ... ah well, there go the family rules about everything having to fit!

These are a popular gifting item these days. At a local crafting fair, vendors were selling them for $14.95 + tax! I easily made mine for around $4 and they are a nice quick and easy gift for the hard-to-shop-for person on your list!

Here is what I did: I sewed an inner bag from white cotton* (10" x 21") and left the top open. I measured out 3 cups of wheat (hard wheat kernels are available for little cost at any bulk food store) into a medium sized bowl and mixed in 4 drops of Lavender essential oil (optional) which is known for its calming and relaxing properties.

I added the wheat to the cotton bag and folded in the top and stitched it closed. Because essential oils can stain a little, I also made a slightly larger removable outer bag from some ladybug fabric I got at Joann's (those ladybugs are just too cute!). This outer bag can be removed to be washed which is great if someone uses it first on their shoulders, then decides to use it on their feet ... eww! For the tag, I modified the poem that I found here at Creative Outlet Designs. Her tutorial for "wheat sacks" is great!

The bag should be heated in the microwave no longer than 2 minutes on HIGH and the wheat shifted around before placing it on your aching muscles. It is a nice moist heat that comes from the kernels which I like. My little guys dislike the smell of the wheat on its own, but are keen on naturally scented ones (but I avoid lavender and tea tree oil around them always). Also, it is good to heat the bag a few times before gifting as the wheat smell becomes less and less the more it is heated and used. Another use for these wheat bags is to pop them in the freezer and use them as an alternative to the traditional ice pack.

* It is best to use natural fibers for the bags because it you do heat them in the microwave.

Tuesday, December 15, 2009

Baby Burp Cloths


These make such wonderful baby gifts! Since so many girlfriends are expecting, I have been turning out so many of these burp clothes. I used flannel on both sides and added a hand stamped card for a personal touch. I always like to write "wash and wear often" on mine. I found the pattern for these over at homemadebyjill (she has easy to follow instructions for all you non-sewers like me!)


Kristin
Related Posts Plugin for WordPress, Blogger...

ShareThis